

For the past few months I've been considering getting my eyebrows microbladed - for those who don't know what mircoblading is, it's basically getting your eyebrows tattooed onto your face. My eyebrows, while not terrible, were quite light coloured so they looked a lot more sparse then they actually were when I didn't fill them in. There were also a few patchy spots, particularly towards the front of my brows. Well it seems the universe heard my calls because not long after I began considering it, the wonderful team from Sydney College of Hair & Beauty reached out and asked if I wanted to come in and get them done - you know I said yes.
My brows were done by the head of the College, Zara Naderi, while two students watched her technique.
If you don't know what mircoblading is, basically the brow technician uses a thin blade with some pigment on it and will cut very fine lines into your brow area to basically tattoo on lines that will look like brow hairs. While I have been calling it a tattoo for simplicity sake, microblading is a bit different as the cut, and therefore the pigment, doesn't go as deep into your skin. So they will fade over a span of 1 - 2 years, making them a more semi-permanent tattoo. Personally I think this is great because I feel like the brow trend is changing all the time and if you find yourself getting over the shape you have or just don't end up loving having your brows permanently on fleek, you can know you will eventually be able to change it.
The great thing about the mircoblading process is that it can be done to suit all types of brows - whether you want something a little more subtle, if you need a minor fill in or a major fill in.
So what is the process like?
When I first arrived, the first thing Zara did was apply numbing cream. After she talked through the process with her students, I was taken into the beauty room and Zara began drawing up the shape of my brows. She really took her time using her measurement technique to make sure the arch and various points of my brows sat where they should for the shape of my face. She then showed me for me approval - she nailed it!
After that we picked which colours to use. Zara had a chart which helps narrow down the colour range based on my hair colour and skin tone. We picked out three and Zara rubbed each on my forehead to show me the shades - something to remember when picking your colour: it will fade about 50% once it has healed, so it can be ok to lean towards a darker shade if you're not sure. We ended up choosing three different shade to help give my brows a more natural, ombre effect.
Zara also spent some time cleaning up my brows. I've never really had my brows professional shaped or trimmed before so I was also pretty impressed with her handiwork here.
Then the mircoblading again...
I have to say, it bloody hurt! I did have numbing cream applied beforehand, but I have a feeling it may have worn off or I may just need to have more applied next time, but it certainly wasn't the most comfortable experience - but pain is beauty right! Also I have quite a low pain threshold.
So there were a few different techniques used during my appointment, and depending on what you want and need will depend on what techniques might be used on you. I had the mircoblading done and Zara also used a tattoo gun on the tail end and middle of my brows to give them a little bit of shading so they have a more filled-in look rather than just the brow-like strokes. My process took a little longer than usual as Zara was going a little slower and stopping at times to explain and show things to the students, but most people say their sessions last an hour or so.
Aftercare
When it comes to looking after your new brows directly after your appointment, you basically want to avoid them having contact with anything for at least a week - water, skincare products, sunscreen, hair products, etc. Even once they're healed up it's best to try and avoid ever rubbing them with any products to help with their longevity.
The only thing you should be putting on them as they heal is Bepanthen cream - but don't go to crazy. A tip Zara told me was to give your brows some time to breath and air out before applying a new layer of cream. I did this by just applying some in the morning before I left the house and at night before bed.
By the second day after my appointment they had certainly darkened up, which I knew was going to happen so it wasn't to shocking. Halfway through the following week my brows has scabbed up and some of the scabs were starting to fall off, in fact once I hit a week after my appointment most of the scabbing had come off (it was so hard to resist the temptation to just peel them off myself, but avoid this at all costs or you might end up peeling away the pigment as well!). I didn't experience any sort of pain during the healing process, though some sections were slightly tender the next day but that cleared up within a couple of days. The only other thing you may notice is that your eyebrows start to get itchy as they scab - DO NOT SCRATCH!
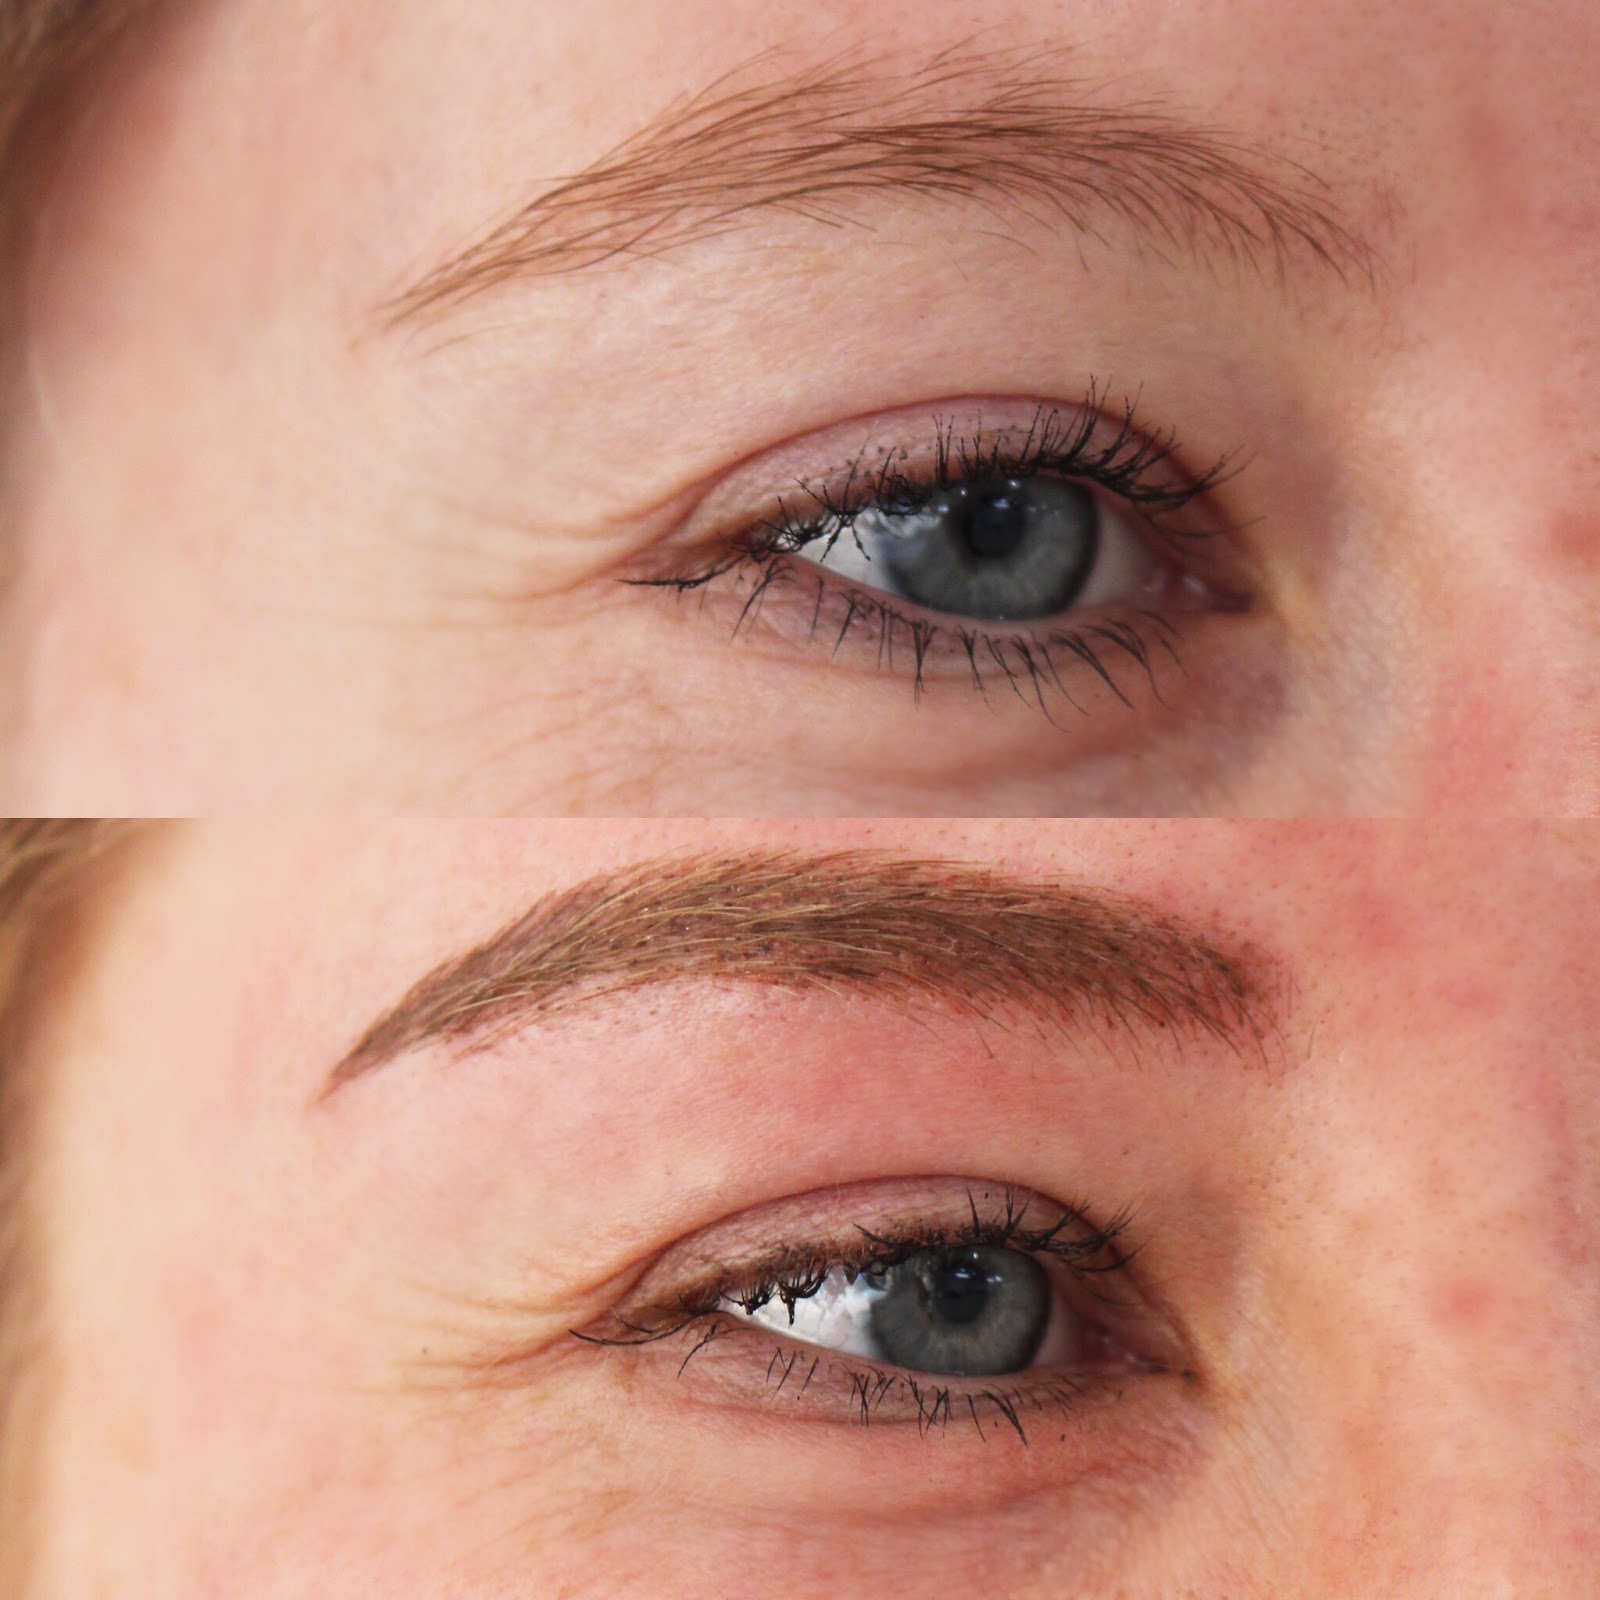
I'm currently sitting at three weeks since my appointment and I've popped a photo below of their healing progress. The top is the day after my appointment and the bottom photo was around two weeks out, and they have pretty much stayed the same since.

As you can see my result is a brow that isn't to dramatic but certainly has a fuller shape then previously - remembering I have zero product in them in all these pictures.
These two photos were taken at the College, the top directly before my mircoblading and the bottom directly after my treatment - in this photo my brows don't look particularly neat because there was still a lot of excess ink sitting in the brows.
So what's next?
From here I will go back in for a touch-up session about 6 - 8 weeks after my first appointment. This session will be to redo any areas that didn't hold as well and make any changes/adjustments I want.
Final thoughts...
I have to say I've been pretty happy with them so far. While some sections of my brows haven't held as well (particularly the very front of my brows) I know that will get fixed up in my next appointment. Aside from that, it has been amazing to get out of bed each day and not have to touch my eyebrows. Even with the necessary touch ups my eyebrows are still so much better than they were before - you can actually tell I have eyebrows now without me adding makeup and they are patch free.
Another benefit of having them microbladed is having a permanent shape to follow to help with maintaining those pesky hairs!
I plan to do another update after I've healed from my touch-up session and give my final conclusion on the whole process, so keep an eye out.
For the past few months I've been considering getting my eyebrows microbladed - for those who don't know what mircoblading is, it's basically getting your eyebrows tattooed onto your face. My eyebrows, while not terrible, were quite light coloured so they looked a lot more sparse then they actually were when I didn't fill them in. There were also a few patchy spots, particularly towards the front of my brows. Well it seems the universe heard my calls because not long after I began considering it, the wonderful team from Sydney College of Hair & Beauty reached out and asked if I wanted to come in and get them done - you know I said yes.
My brows were done by the head of the College, Zara Naderi, while two students watched her technique.
If you don't know what mircoblading is, basically the brow technician uses a thin blade with some pigment on it and will cut very fine lines into your brow area to basically tattoo on lines that will look like brow hairs. While I have been calling it a tattoo for simplicity sake, microblading is a bit different as the cut, and therefore the pigment, doesn't go as deep into your skin. So they will fade over a span of 1 - 2 years, making them a more semi-permanent tattoo. Personally I think this is great because I feel like the brow trend is changing all the time and if you find yourself getting over the shape you have or just don't end up loving having your brows permanently on fleek, you can know you will eventually be able to change it.
The great thing about the mircoblading process is that it can be done to suit all types of brows - whether you want something a little more subtle, if you need a minor fill in or a major fill in.
So what is the process like?
When I first arrived, the first thing Zara did was apply numbing cream. After she talked through the process with her students, I was taken into the beauty room and Zara began drawing up the shape of my brows. She really took her time using her measurement technique to make sure the arch and various points of my brows sat where they should for the shape of my face. She then showed me for me approval - she nailed it!
After that we picked which colours to use. Zara had a chart which helps narrow down the colour range based on my hair colour and skin tone. We picked out three and Zara rubbed each on my forehead to show me the shades - something to remember when picking your colour: it will fade about 50% once it has healed, so it can be ok to lean towards a darker shade if you're not sure. We ended up choosing three different shade to help give my brows a more natural, ombre effect.
Zara also spent some time cleaning up my brows. I've never really had my brows professional shaped or trimmed before so I was also pretty impressed with her handiwork here.
Then the mircoblading again...
I have to say, it bloody hurt! I did have numbing cream applied beforehand, but I have a feeling it may have worn off or I may just need to have more applied next time, but it certainly wasn't the most comfortable experience - but pain is beauty right! Also I have quite a low pain threshold.
So there were a few different techniques used during my appointment, and depending on what you want and need will depend on what techniques might be used on you. I had the mircoblading done and Zara also used a tattoo gun on the tail end and middle of my brows to give them a little bit of shading so they have a more filled-in look rather than just the brow-like strokes. My process took a little longer than usual as Zara was going a little slower and stopping at times to explain and show things to the students, but most people say their sessions last an hour or so.
Aftercare
When it comes to looking after your new brows directly after your appointment, you basically want to avoid them having contact with anything for at least a week - water, skincare products, sunscreen, hair products, etc. Even once they're healed up it's best to try and avoid ever rubbing them with any products to help with their longevity.
The only thing you should be putting on them as they heal is Bepanthen cream - but don't go to crazy. A tip Zara told me was to give your brows some time to breath and air out before applying a new layer of cream. I did this by just applying some in the morning before I left the house and at night before bed.
By the second day after my appointment they had certainly darkened up, which I knew was going to happen so it wasn't to shocking. Halfway through the following week my brows has scabbed up and some of the scabs were starting to fall off, in fact once I hit a week after my appointment most of the scabbing had come off (it was so hard to resist the temptation to just peel them off myself, but avoid this at all costs or you might end up peeling away the pigment as well!). I didn't experience any sort of pain during the healing process, though some sections were slightly tender the next day but that cleared up within a couple of days. The only other thing you may notice is that your eyebrows start to get itchy as they scab - DO NOT SCRATCH!
I'm currently sitting at three weeks since my appointment and I've popped a photo below of their healing progress. The top is the day after my appointment and the bottom photo was around two weeks out, and they have pretty much stayed the same since.
As you can see my result is a brow that isn't to dramatic but certainly has a fuller shape then previously - remembering I have zero product in them in all these pictures.
These two photos were taken at the College, the top directly before my mircoblading and the bottom directly after my treatment - in this photo my brows don't look particularly neat because there was still a lot of excess ink sitting in the brows.
So what's next?
From here I will go back in for a touch-up session about 6 - 8 weeks after my first appointment. This session will be to redo any areas that didn't hold as well and make any changes/adjustments I want.
Final thoughts...
I have to say I've been pretty happy with them so far. While some sections of my brows haven't held as well (particularly the very front of my brows) I know that will get fixed up in my next appointment. Aside from that, it has been amazing to get out of bed each day and not have to touch my eyebrows. Even with the necessary touch ups my eyebrows are still so much better than they were before - you can actually tell I have eyebrows now without me adding makeup and they are patch free.
Another benefit of having them microbladed is having a permanent shape to follow to help with maintaining those pesky hairs!
I plan to do another update after I've healed from my touch-up session and give my final conclusion on the whole process, so keep an eye out.
.
9/24/18
.
beauty /
eyebrows /
microblading /
skincare
No comments
Post a Comment
I love reading your comments, so leave me a little something below.